Cooling System
The cooling system in an Audi S6 or S7 efficiently manages engine temperature through a network of radiators, fans, and coolant channels, ensuring optimal performance and preventing overheating.
- Cooling Upgrades
- Cooling Upgrade Installations
- MercRacing V2 Intercooler Brick vs OEM Brick Analysis by D. Bui
Cooling Upgrades
Potential cooling upgrades for your Audi S6 / S7
CWA100 Pump Upgrade
Original by BHVRDR
I have finally gotten around to writing on this topic after people have shown interest. I want to thank Tecomotive.com for making the specifications of these pumps so readily available. The data they provide is available from Pierburg, but Tecomotive graciously makes this information easy to find and decipher on their site. They also offer wiring harnesses. For more information on these pumps, please see this thread: https://mbworld.org/forums/w211-amg/...now-about.html
What is the CWA100?
The stock supercharger coolant recirculation pump in our car is an extremely robust and powerful pump, especially when flowing against head pressure. The stock pump is a Pierburg CW50. As people add additional heat exchangers, killer chillers, or increased boost, they may want improved circulation.
Here are the specifications of the stock Pierburg CWA50 and CWA100:

As you can see, the CWA100 almost doubles the flow of the CWA50. According to the technical documents, it also significantly outperforms hobby-style pumps such as the Varimax and Meziere pumps when any head pressure is encountered.
CWA100-2 versus CWA100-3
There are three different versions of the CWA100 pump, but we will focus on the currently available versions, the CWA100-2 and the CWA100-3. According to the specifications, there are no flow differences between these pumps; they should both work identically. The only differences are as follows:
- The CWA100-3 has slightly shorter water inlets and outlets.
- The connectors on the CWA100-2 and CWA100-3 are different.
I have had both of these pumps.
Here is the connector/socket for the CWA100-2:

Here is the connector/socket of the CWA100-3:

Availability of the CWA100 Variants:
- CWA100-2: This is an old AMG pump that was used in many Mercedes-Benz supercharged applications. The Mercedes-Benz part number is: A0005000486. You can source this part from many MB dealerships as a remanufactured item in the $300 to $350 range. FCP Euro currently has it for $342, with a lifetime warranty. Tecomotive also has it available for 249 Euros, and you can buy the plug-and-play connector from them. They are a great site to support, as they have published most of the research you see here.
- CWA100-3: This is a new VAG pump used in the Audi Q7 4M hybrid overseas. The VAG part number is: 4N0965567. Interestingly, you can find this pump from salvage cars on eBay for around $75. HOP ON THIS WHILE YOU CAN!
Harnesses for Each of These Pumps
You can easily make a harness for each of these pumps.
Here are the part numbers needed for the CWA100-2:
- Connector to the CWA10-2 Pump: BMW part number: 12527549033 (available at ECStuning or FCP for under $5)
- Connector to the stock harness: TE Connectivity p/n 1-1703494-1 (available on arrow.com for $1.69)

Here are the part numbers needed for the CWA100-3:
- Connector to the CWA100-3 Pump: VAG part number: 4D0971993 (available on eBay for around $8)
- Connector to the stock harness: TE Connectivity p/n 1-1703494-1 (available on arrow.com for $1.69)


You should be able to make either of these harnesses for around $10-$15 or less.
PIN Diagrams:
CWA50

CWA100-2

CWA100-3

Cooling Upgrade Installations
Installation instructions for cooling upgrades on your Audi S6 / S7.
Coolant AN Line Upgrade Install
Part Available: TGK Motorsports AN Coolant Line Upgrade Kit
- Remove Headlight Plastic Covers
For the S7, remove any plastic covers around the headlights to access the radiator area. This step does not apply to the S6. - Remove Radiator Cover
Detach the radiator cover by removing the two plastic pins at the top. Set the cover aside. - Remove Underneath Plastic Cover
With the radiator cover removed, locate and unscrew the three T30 bolts beneath it to detach the additional plastic cover. - Remove Intake
Remove the intake to access the coolant lines and components. - Remove Intake Air Guide
If using a factory intake, remove the two T30 bolts securing the air guide. For aftermarket intakes, use the appropriate Allen wrench. - Remove Splash Shields
Pull back or remove the splash shields beneath the vehicle to access the lower cooling system components. - Drain Coolant
- Place a suitable coolant catch pan underneath the car and ensure the engine is cool to avoid burns.
- Carefully open the coolant reservoir cap with a cloth to relieve any pressure, preventing hot coolant from spraying.
- Using a Phillips-head screwdriver, open the coolant drain plug to let the system drain completely.
WARNING: The cooling system will require additional tools for full draining and filling; follow Audi’s coolant filling and bleeding procedures to prevent air pockets and overheating.
- Disconnect OEM Coolant Lines
Lift up on the release tabs of the OEM coolant lines, then pull them straight out to disconnect. Expect some residual coolant to drain out, so keep a rag or container ready.
- Install AN Adapters
Install the AN adapters by double-wrenching each securely. Ensure that each adapter is seated properly to prevent leaks. - Route and Install AN Lines
- Route the front coolant line, using both 45-degree and 90-degree connectors.
- Avoid the factory path; route the lines around the front of the engine and through the center of the core support to the radiator for optimal clearance and fit.

- Connect to Coolant Crossover Line
Use the supplied barb fitting to attach the AN line to the coolant crossover line on the passenger side. Tip: Temporarily removing the rubber crossover hose can make it easier to attach the barb fitting before re-securing.
- Refill Coolant
- Refill the coolant system with Audi-approved coolant mixed with distilled water according to Audi’s recommended ratios (e.g., 50% coolant and 50% water for most regions - using distilled water prevents mineral deposits and corrosion)
- Fill the system up to the recommended level, as marked on the coolant reservoir.
Note: Use the VAS6096 or similar coolant filling tool if available to eliminate air pockets during the refill process.
- Bleed Air from the System
- Remove the upper cowl cover and open the bleed port.
- Allow coolant to flow from the bleed port until no air bubbles are visible.
- Close the bleed port and reinstall the cowl cover.
- Jack up the passenger side of the car to help move any trapped air toward the bleed port.
- Set the heater to high (HI) with the fan on low to open the heater core.
- Reopen the bleed port briefly to release any remaining air from the heater core area.
- Turn off the A/C (ensure the LED in the A/C button is off).
- Run the engine at 3500 RPM for about 4 minutes to push coolant through the system.
- Allow the engine to idle until the temperature gauge reaches 90°C (194°F) and both heater hoses are warm.
- Run the engine at 2000 RPM for 2 more minutes to ensure full circulation.
Important: Once the system is bled, run the engine as specified in Audi’s service guide, typically at idle and then at 2000 RPM, to circulate coolant fully and confirm no air pockets remain.
Following these detailed steps should ensure a secure, leak-free installation of the TGK AN coolant lines.
Refer to TGK Motorsports and Audi’s maintenance manuals for additional insights and troubleshooting support.
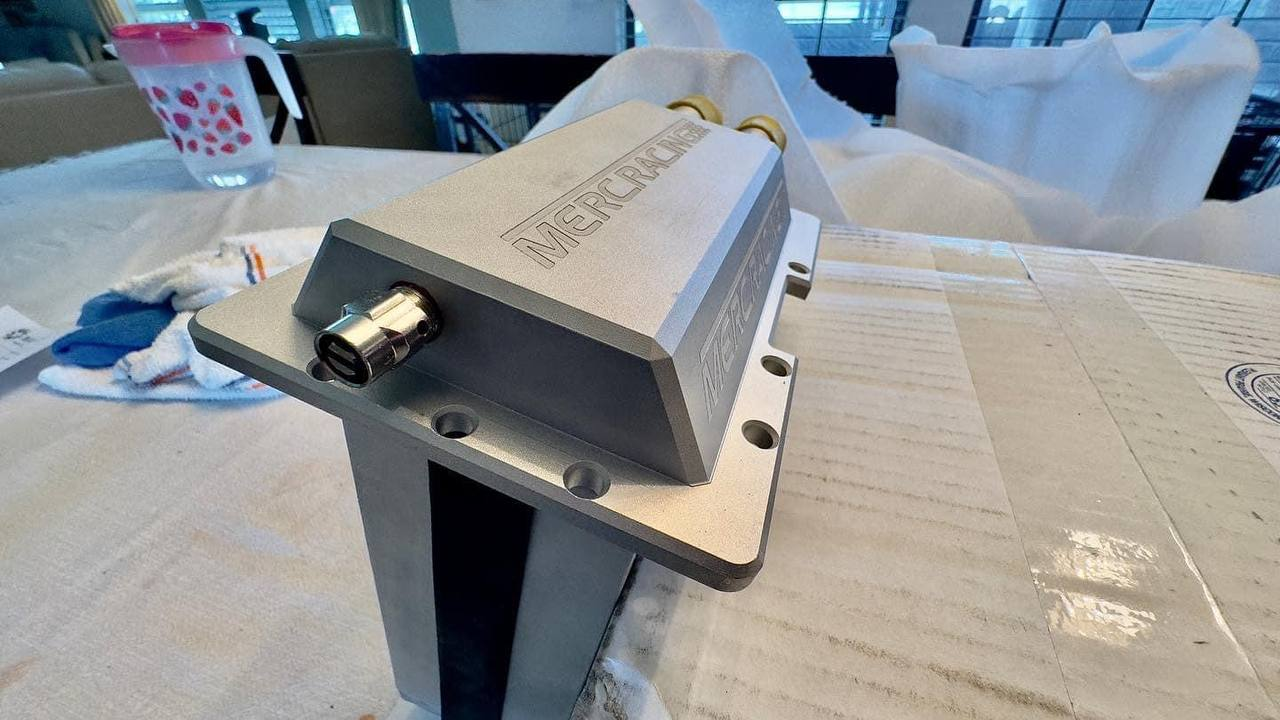
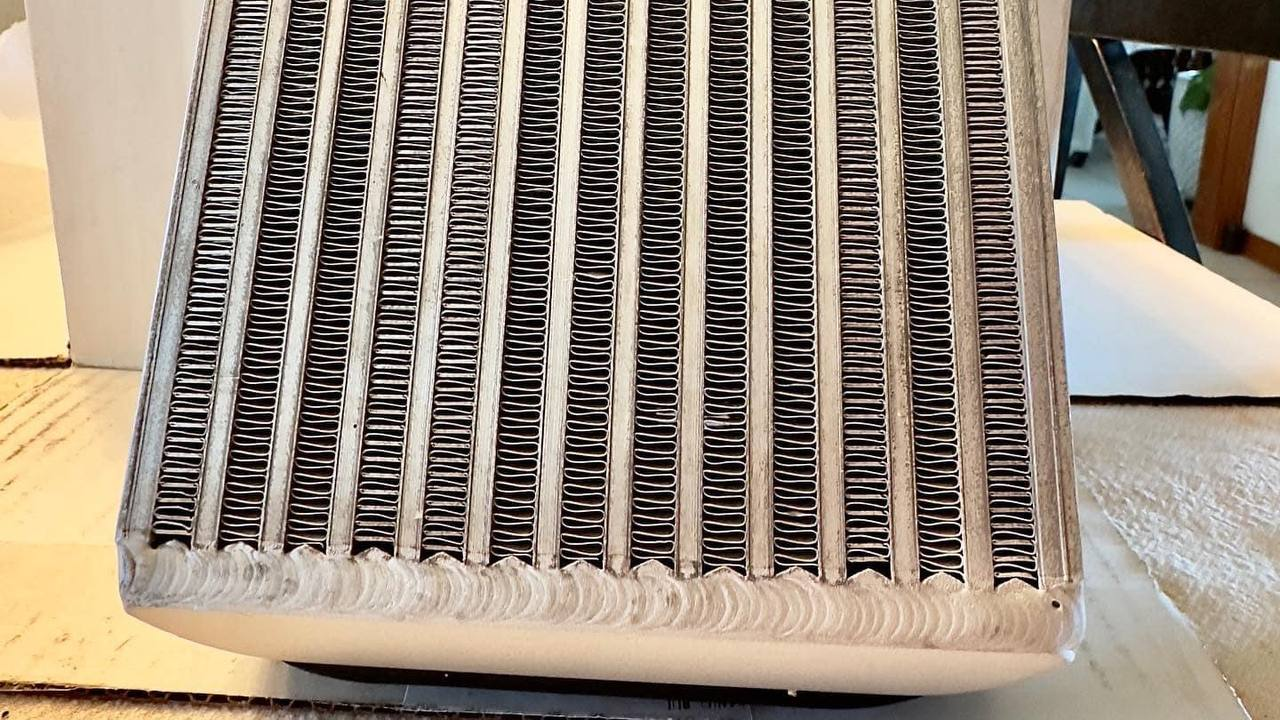
MercRacing V2 Intercooler Brick vs OEM Brick Analysis by D. Bui
Analysis by: Daniel Bui
Test Setup:
2014 S6
TS1 - 30psi
TS wastegates
Inlets and intakes
Upgraded HX
Upgraded IC Brick & OEM
E40
4 bar map sensors
CWA 100 feeding CWA 150
Dual LPFP
HPFP Upgrades
DPs
AWE Exhaust
custom tuning
No WMI during these runs
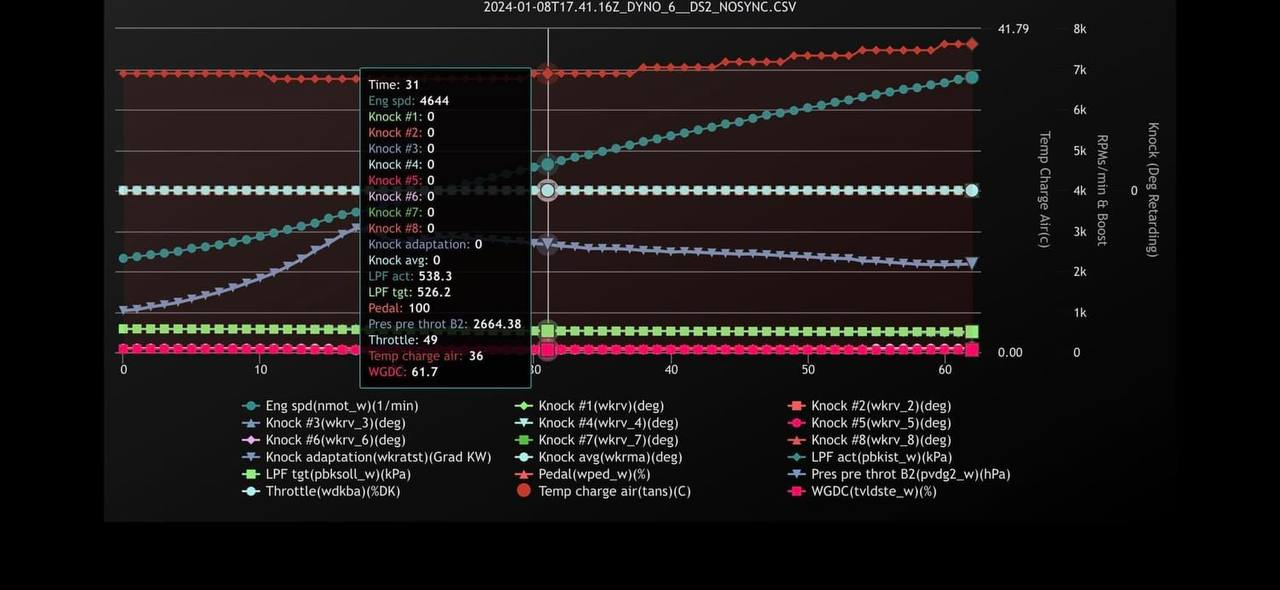
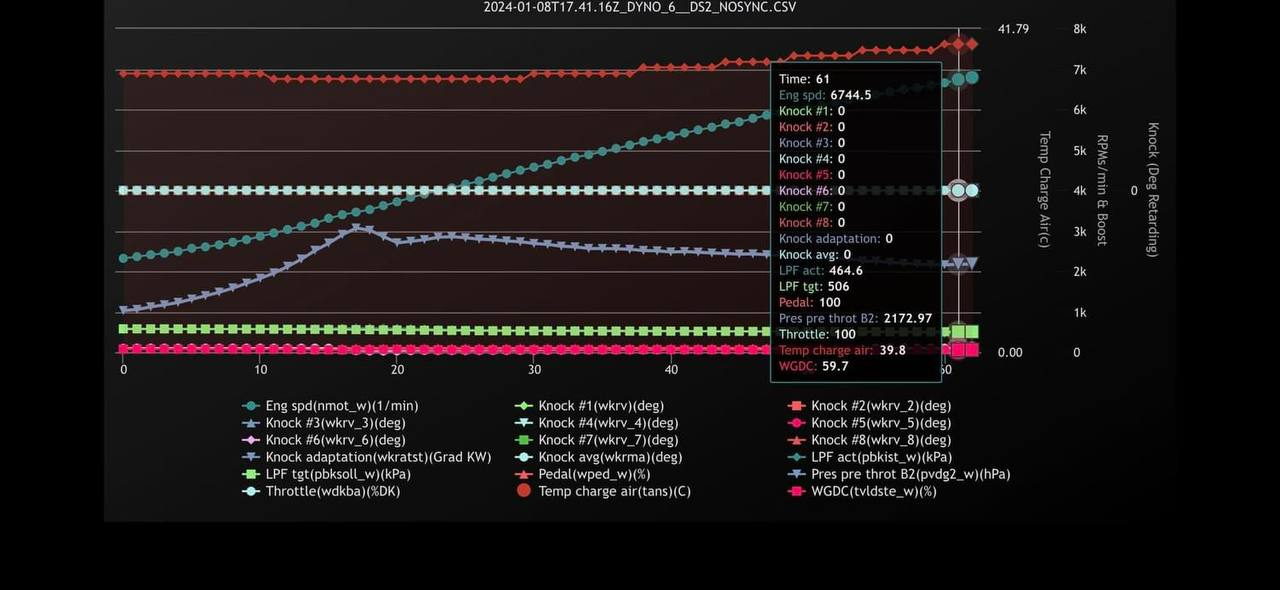
Last year and this year I have had the opportunity to run the OEM IC brick and compare it to the MercRacing V2 IC brick. I did multiple 3rd gear pulls to redline for data logging both last year and this year. Also add all logs were done during 50F degree weather. As my car isn’t finalized with tuning, I grabbed the opportunity to use this data for Jose Mercado.
The first three screenshots were from this year with the V2 IC brick. The Temp Charge Air stays a constant 30c - 39c after back-to-back runs. Staying consistent and recovering extremely quickly. Being this linear is a new one for me.
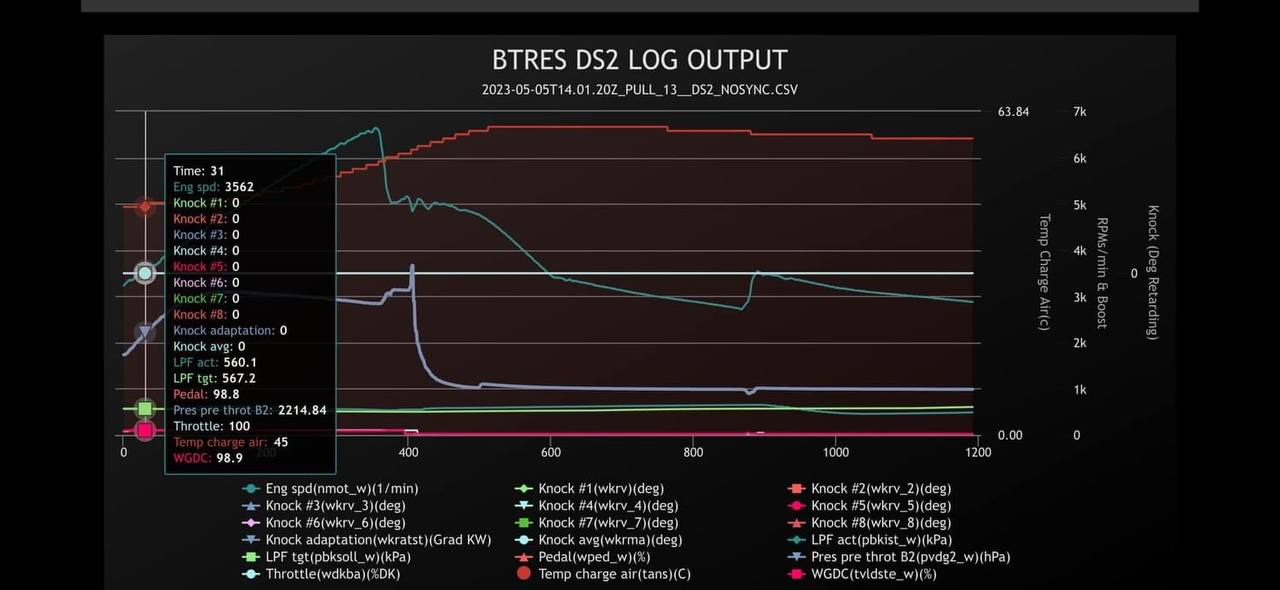
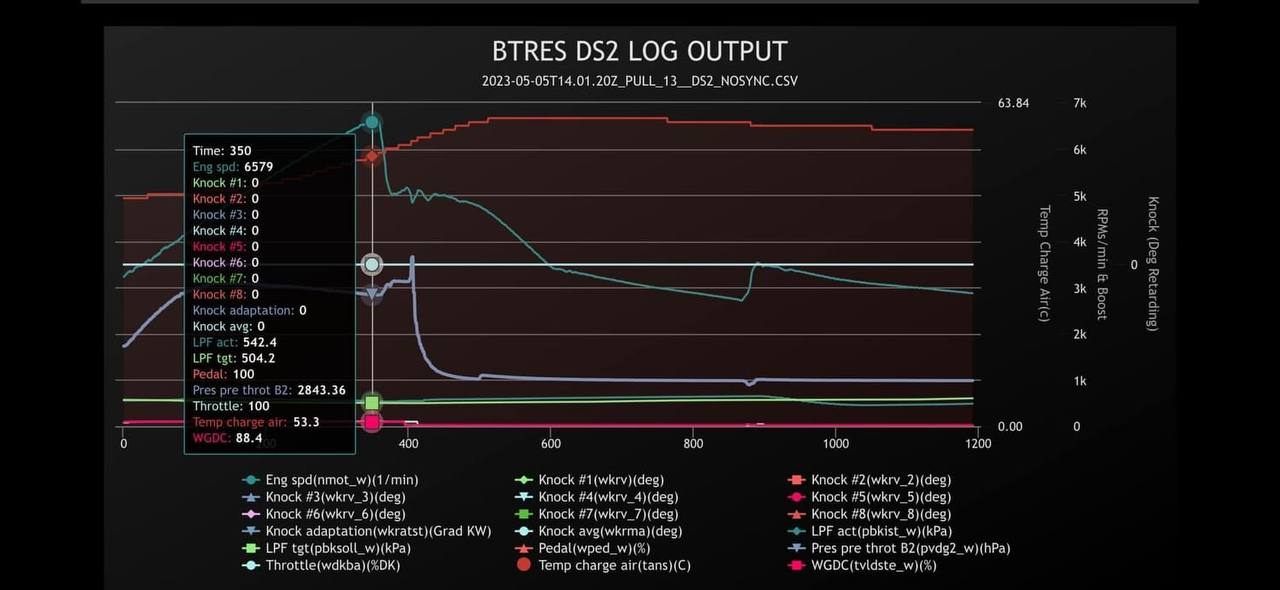
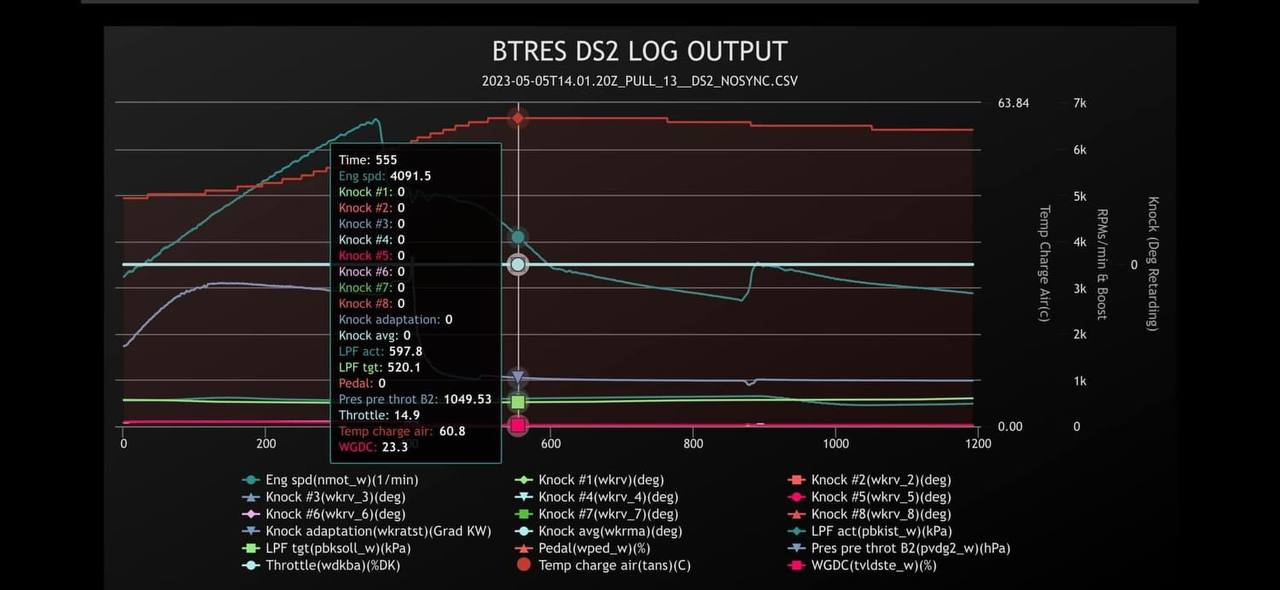
The second set of screenshots were from last year with the OEM IC brick. Same ambient temp of 50F and the temps ranged from 45c - 60c with it staying in 60c+ for a while. Recovery is very poor and slow. Possibly even a few minutes in some cases.
Yes, the V2 is better than the V1 and OEM.
I am not an engineer or technician by any means.
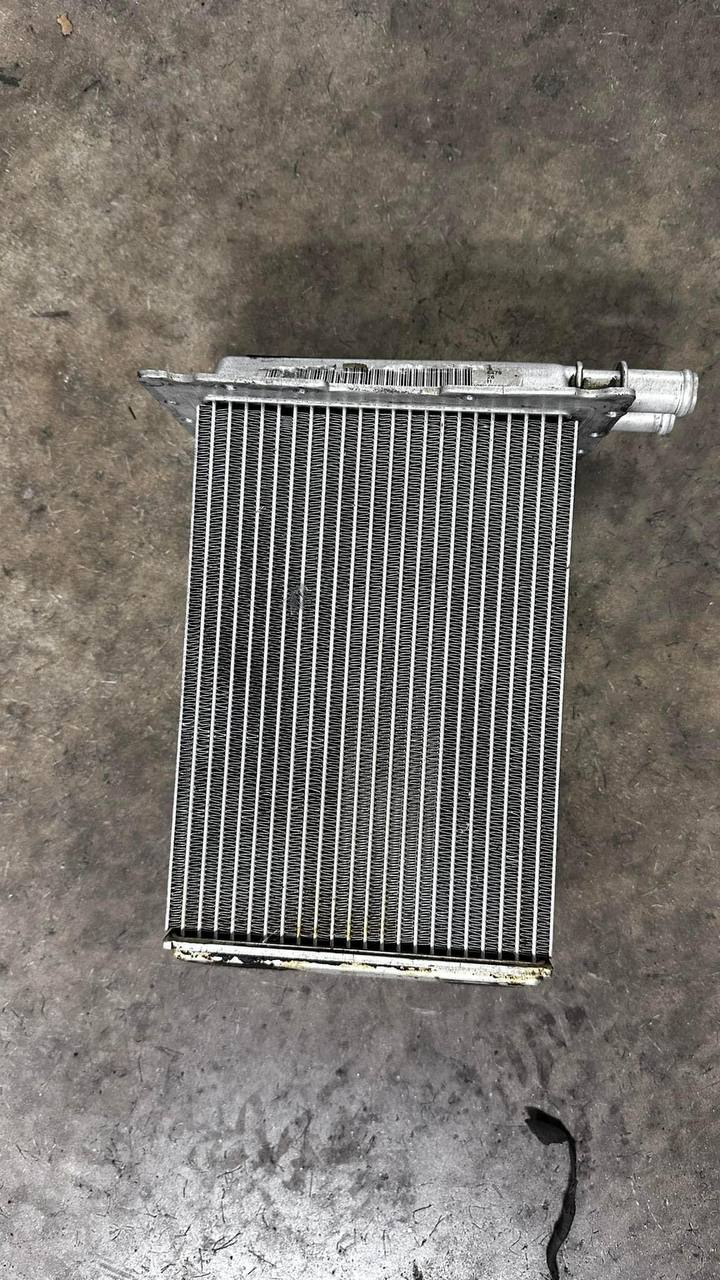
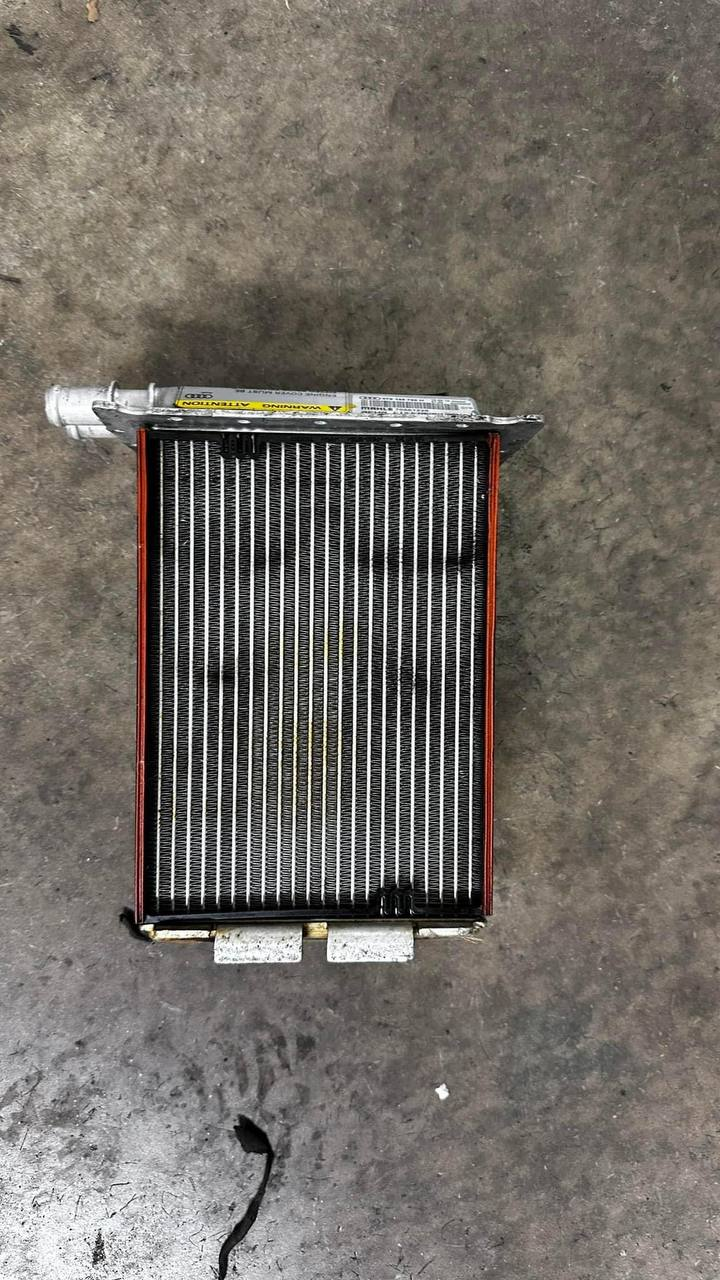
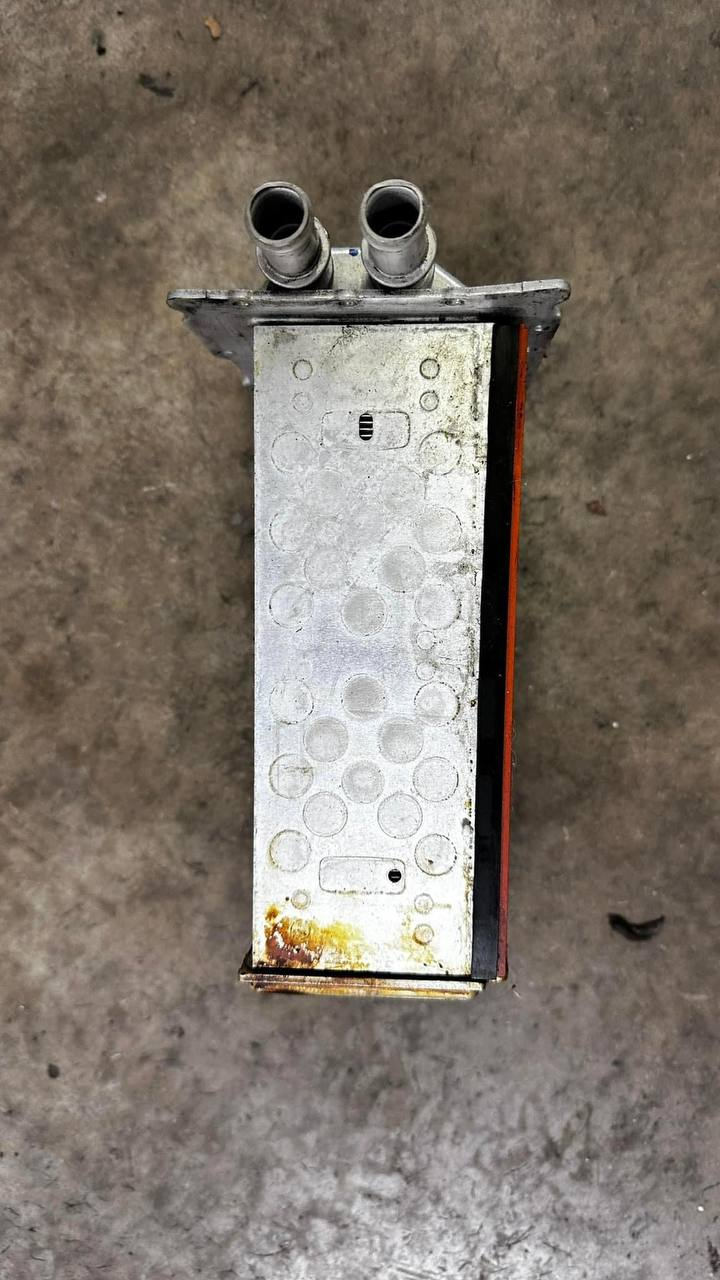
Merc Racing V2:

OEM:
MERC Racing V2:
OEM: